
Protecting workers from the hazards of trenches has lately been front and center in OSHA’s outreach to employers. One critical step in ensuring that you are meeting your obligations to protect employees who dig and work in trenches is to have a solid knowledge of how to classify soils. The Agency has produced an 11-minute video that clearly visualizes the steps in classification using equipment no more complex than a pair of hands.
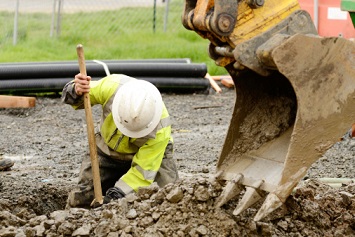
tfoxfoto / iStock / Getty Images Plus / Getty Images
Analysis by Competent Person
OSHA standards at 29 CFR 1926.650, 29 CFR 1926.651, and 29 CFR 1926.652 require protection—usually a physical support system, such as shoring, sloping, or benching—for workers entering a trench of 5 feet (ft) or deeper unless the trench is in stable rock. Moreover, the type of protection must be determined by a competent person based on his or her analysis of the soil into which the trench is dug. “Analysis” can be an intimidating word for some employers, but in fact, the kind of soil analysis OSHA wants to see does not require scientific training and can be ably completed by an employer or employee with good experience managing and conducting trench work. OSHA has provided instructions on classifying soils at 29 CFR 1926 Subpart P, Appendix A.
Employers should read the standards and the appendix and watch the video.
Plasticity and Thumb Tests
Here are a couple of key points made in the video.
- Soils can be classified as Type A, Type B, or Type C. Type A soil, which typically has a clay component, is the most stable soil in which to excavate. Type C, which is typically sand or gravel, is the least stable soil. A trench can be cut through more than one type of soil.
- Before testing, perform a visual evaluation. During excavation, is soil coming out in clumps, or is it granular? Clumps mean that the soil is cohesive and less prone to collapse.
- Take a large clump from the excavated pile; the soil in the pile should be fresh and uncompacted. Test results can change as the soil dries up, so for the best results, samples should be taken and tested as soon as practical.
- There are three main types of tests:
- The plasticity test, sometimes called the pencil test, is performed by rolling a moist soil sample into a thread that’s one-eighth of an inch (in.) thick and 2 in. long, resembling a short, slim pencil. If the sample can be held at one end without breaking, it is cohesive.
- To perform the thumb penetration test, simply press the end of your thumb into a fresh clump of soil. If the soil sample is Type A, your thumb will only make an indentation in the soil with great effort. If the soil sample is Type B, your thumb will sink into the soil up to the end of your thumbnail. If the soil sample is Type C, your thumb will sink all the way into the soil clump.
- Finally, a pocket penetrometer test can be used to determine if the soil is Type A (at least 1.5 tons per square foot (sq ft)), Type B (between 0.5 and 1.5 tons per sq ft), or Type C (less than 0.5 tons per sq ft).
A soil cannot be classified as Type A if the excavation site did not meet all the conditions of the visual test—that is, if it is granular, near a source of vibration, or there are signs of previously disturbed soil, water seepage, or fissured soil.
The narrator of the video concludes by stating, “Determining the type of soil on a site will help a competent person decide which methods of sloping, benching, or shoring are needed to prevent cave-ins and keep workers safe.”